How to Easily Resize Images for Your Website Using Windows (Step-by-Step Guide)
Table of Contents Show
If you've been putting off optimizing your images because it seems complicated, this tutorial is for you.
I'm going to walk you through exactly how to resize images for your Squarespace site using the tools already built into Windows.
What you'll accomplish: Resize images to 1500px or less and get them under 500KB — the sweet spot for fast-loading, professional websites.
What you need: Just your Windows computer.
(If you have a Mac, here’s Apple’s guide on how to crop, resize or rotate images.)
Why Resizing Your Images for Websites Matters

When your images are properly sized:
Your pages load faster
Visitors stay longer instead of bouncing
Google can better understand and rank your content
Everything works smoothly on mobile and slower connections
I’m going to show you how to resize an image step by step using this sample photo I’ve downloaded from KaboomPics (one of my favorite free stock photo sites).
Step-by-Step: Resize Images Using Windows Photos App
Step 1: Open Your Image File
Once you have downloaded images from your brand photographer, stock photo site, or anywhere else you’ve been sourcing images, simply double-click your image file. It will open in the Windows Photos app by default.
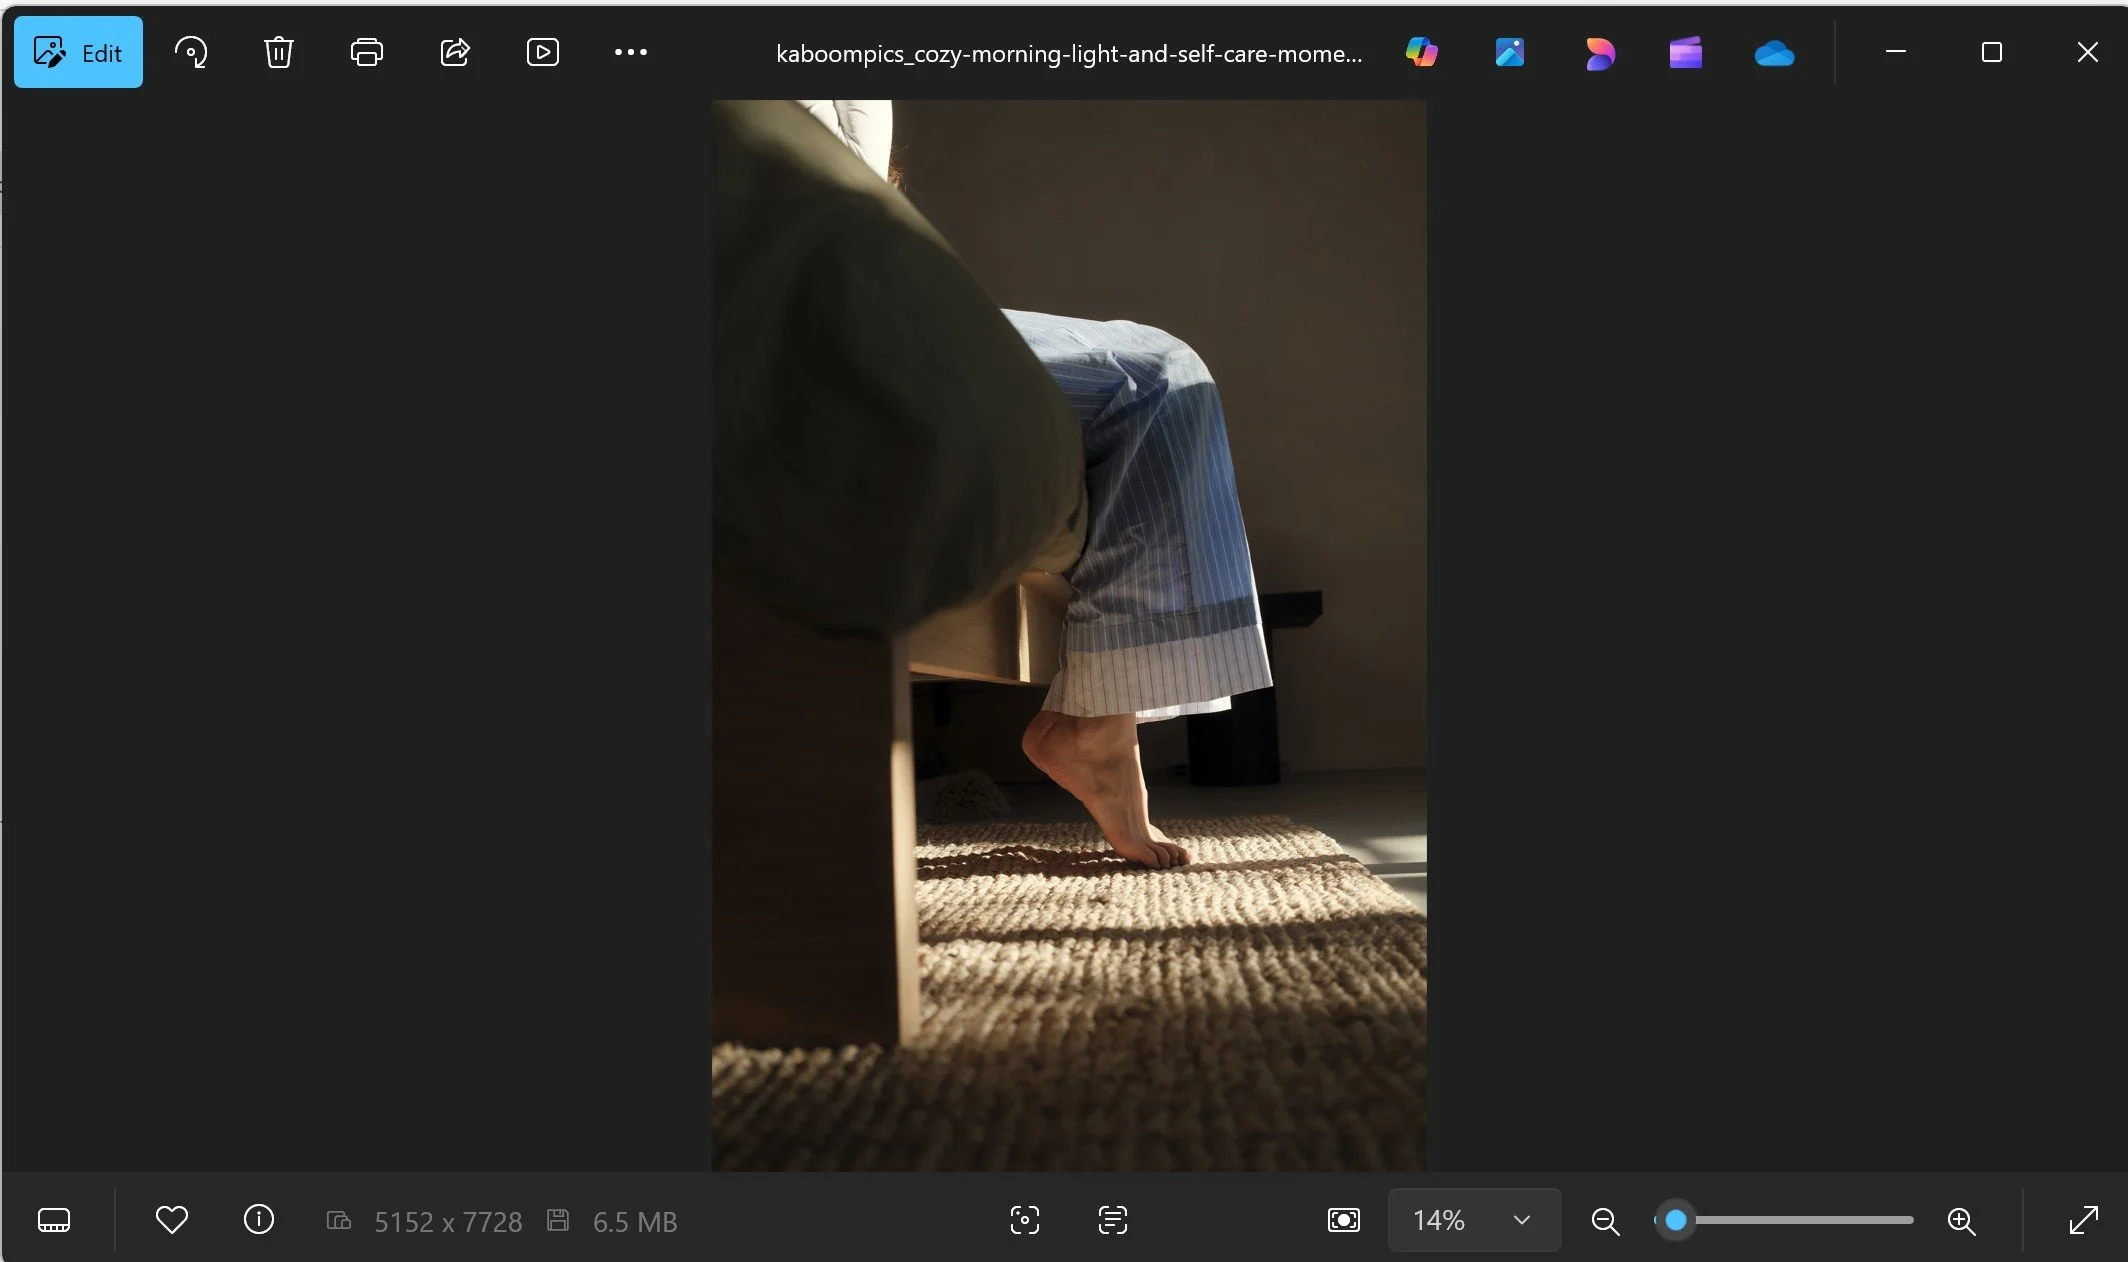
[Screenshot: Initial Photos app view showing the large image with dimensions and file size at bottom]
You can see at the bottom that this image is currently 5152 x 7728 pixels and 6.5 MB — way too big for a website!
Step 2: Start Editing
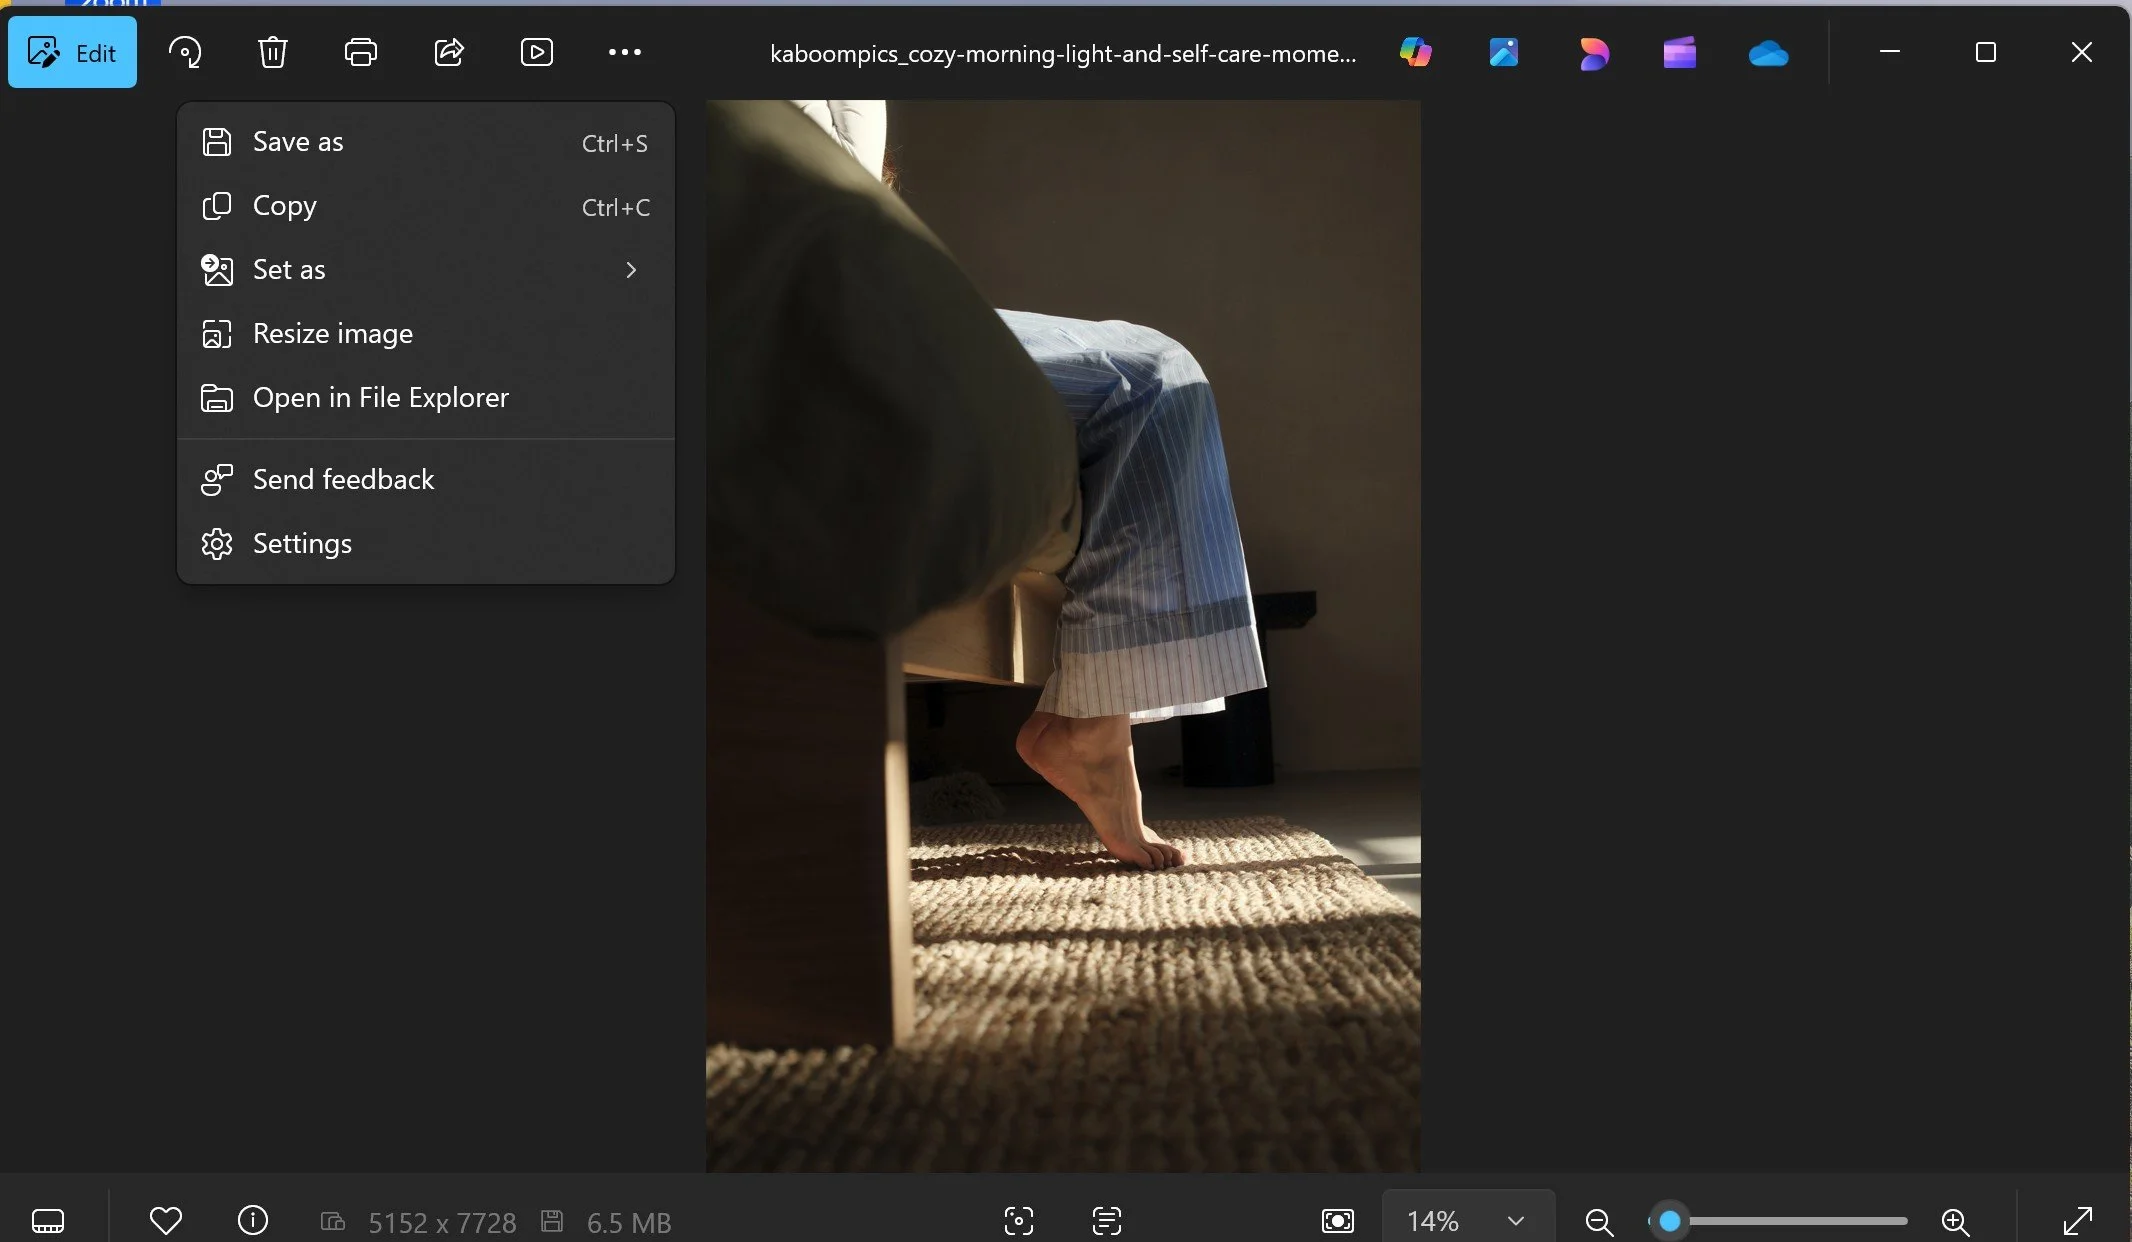
Click the three dots in the top nav bar. It’s on the left-hand side, after the Edit button and all the other action buttons. Click on the resize image option, shown as the fourth one down on this menu.
[Screenshot: Highlighting the Edit button]
Note: The edit button is great for cropping, but that’s not what to press to resize.
Step 3: Access the Resize Tool & Set Your Target Dimensions
Once you click "Resize image”, you’ll see this menu pop up.
[Screenshot: Menu showing "Resize image" option]
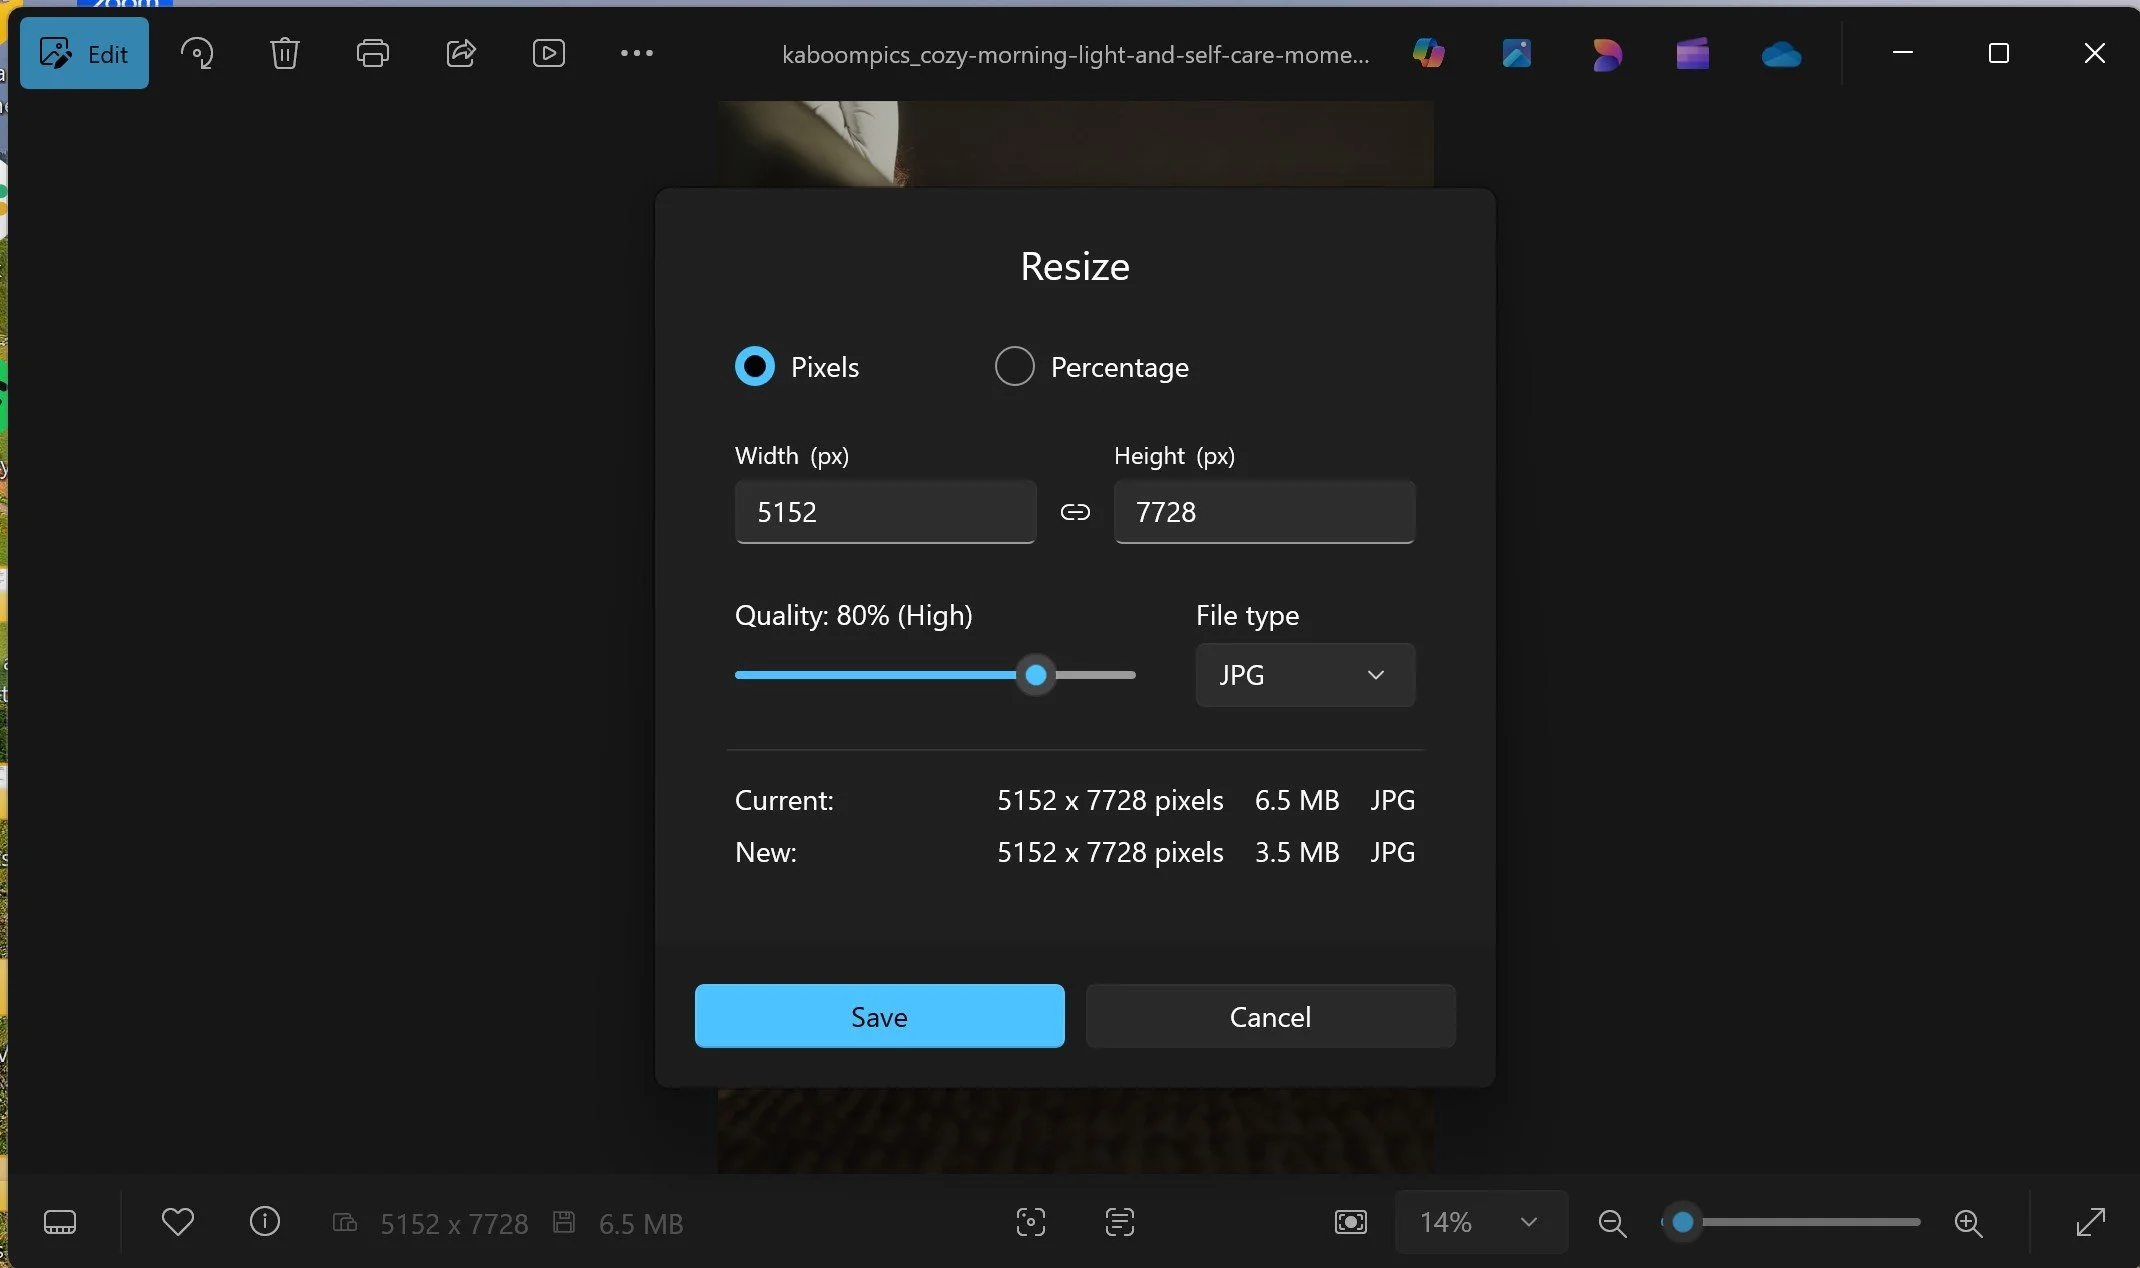
From here, the resize dialog will show you several options:
Choose "Pixels" (it should be selected by default)
Enter your target size: Look at your current dimensions and out of Width and Height, you’ll want to identify the larger number — that's what you'll resize.
For most website images: Set the larger dimension to 1500 pixels
For banner/hero images: Try 2000 pixels and check if the file size stays under 500KB
In this example, the height (7728) is larger than the width (5152), so I'll change the height to 1500. The width will automatically adjust to maintain the proper proportions.
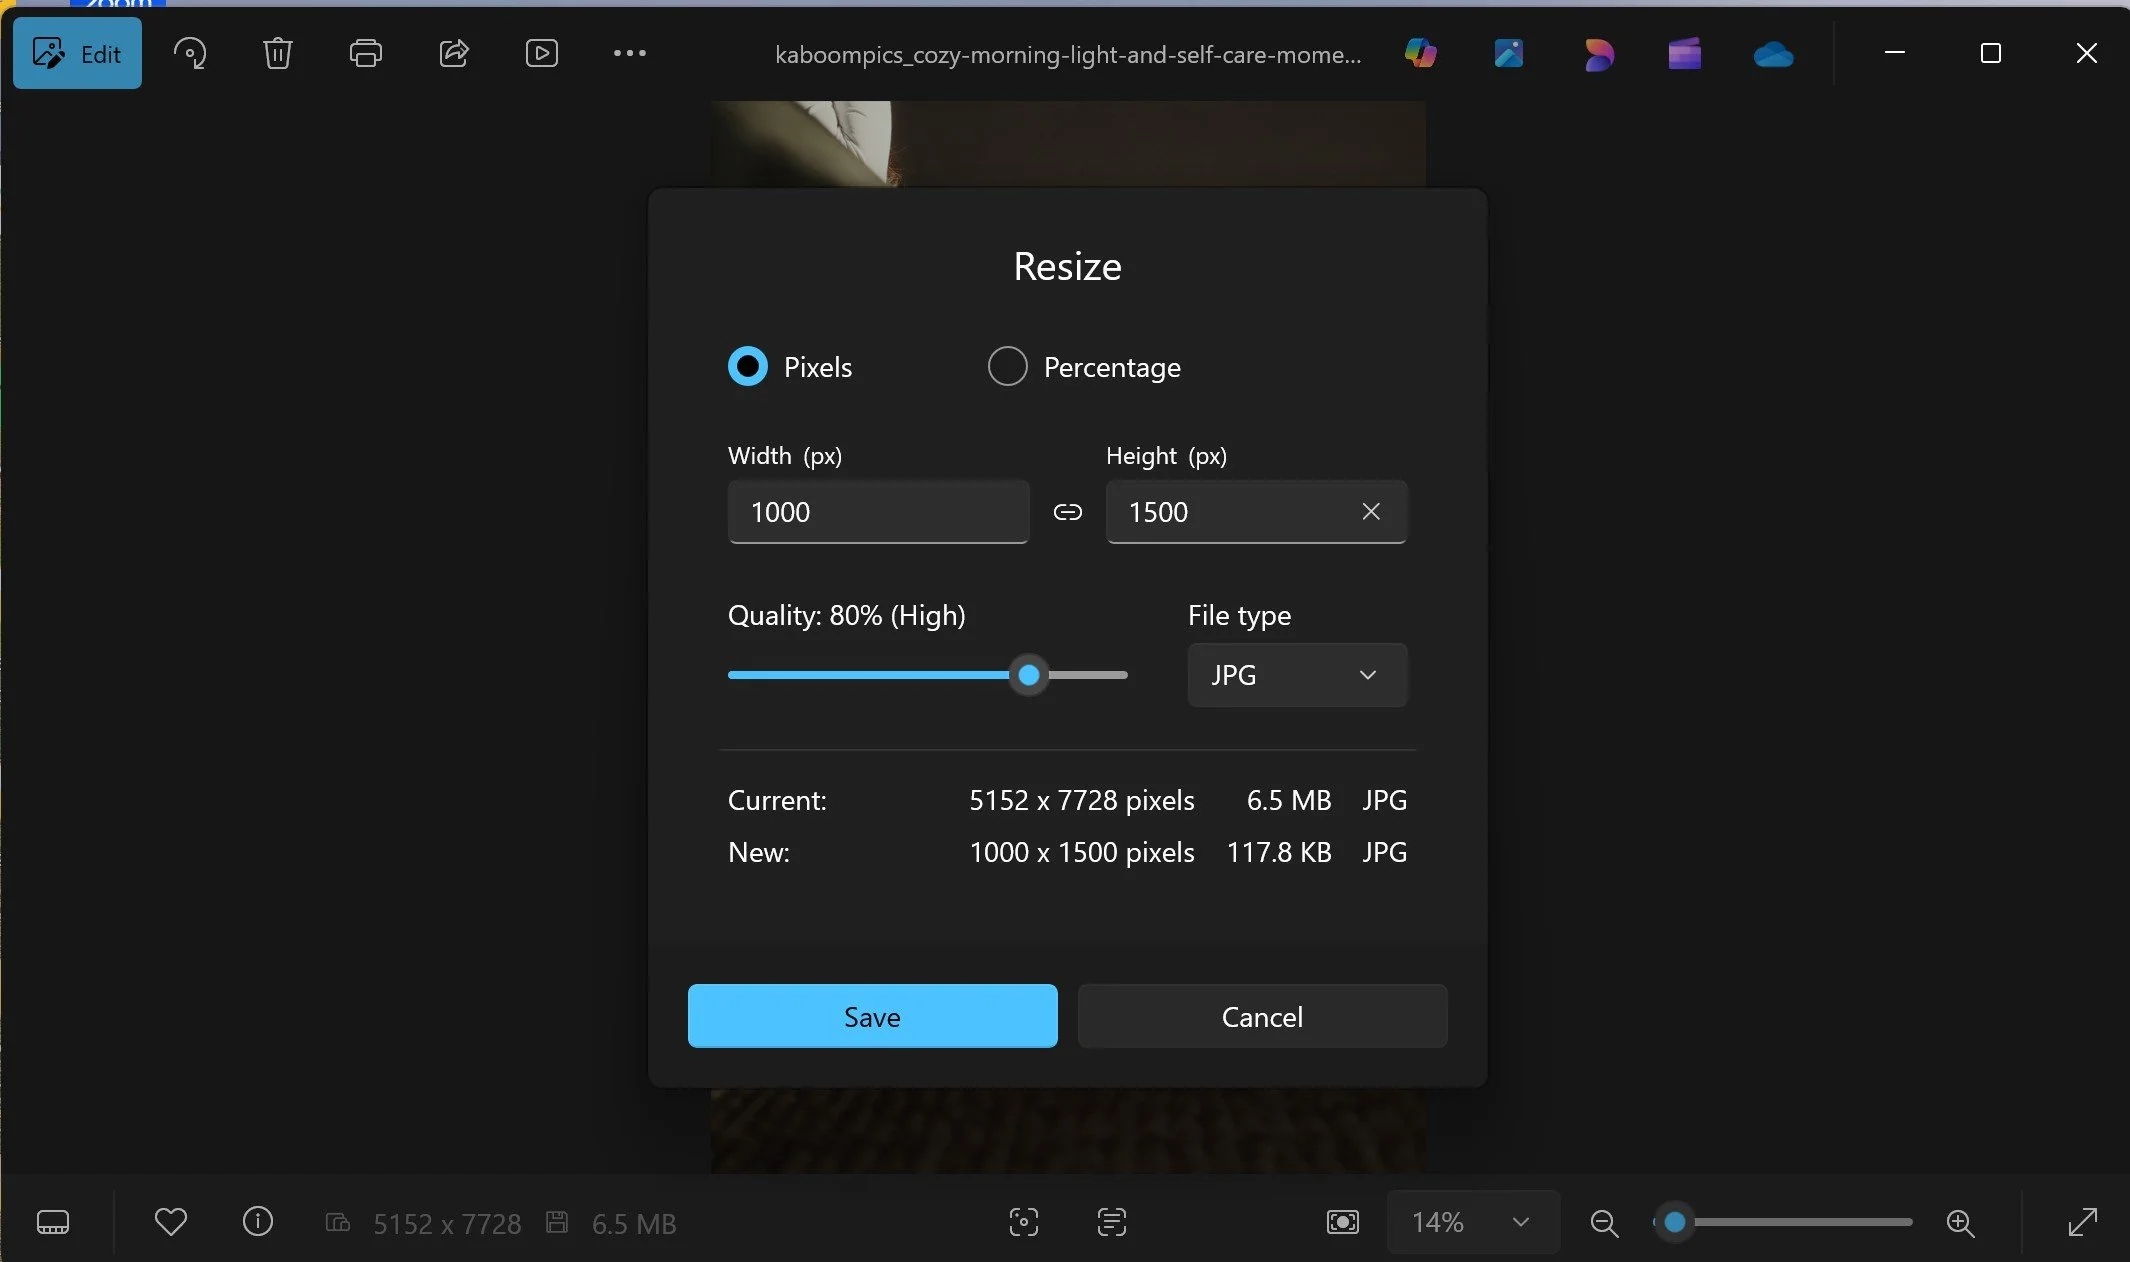
[Screenshot: Resize dialog showing 1000x1500 dimensions with the before/after file sizes]
Pro tip: Notice how the "New" section shows the updated file size (117.8 KB) — much better than the original 6.5 MB!
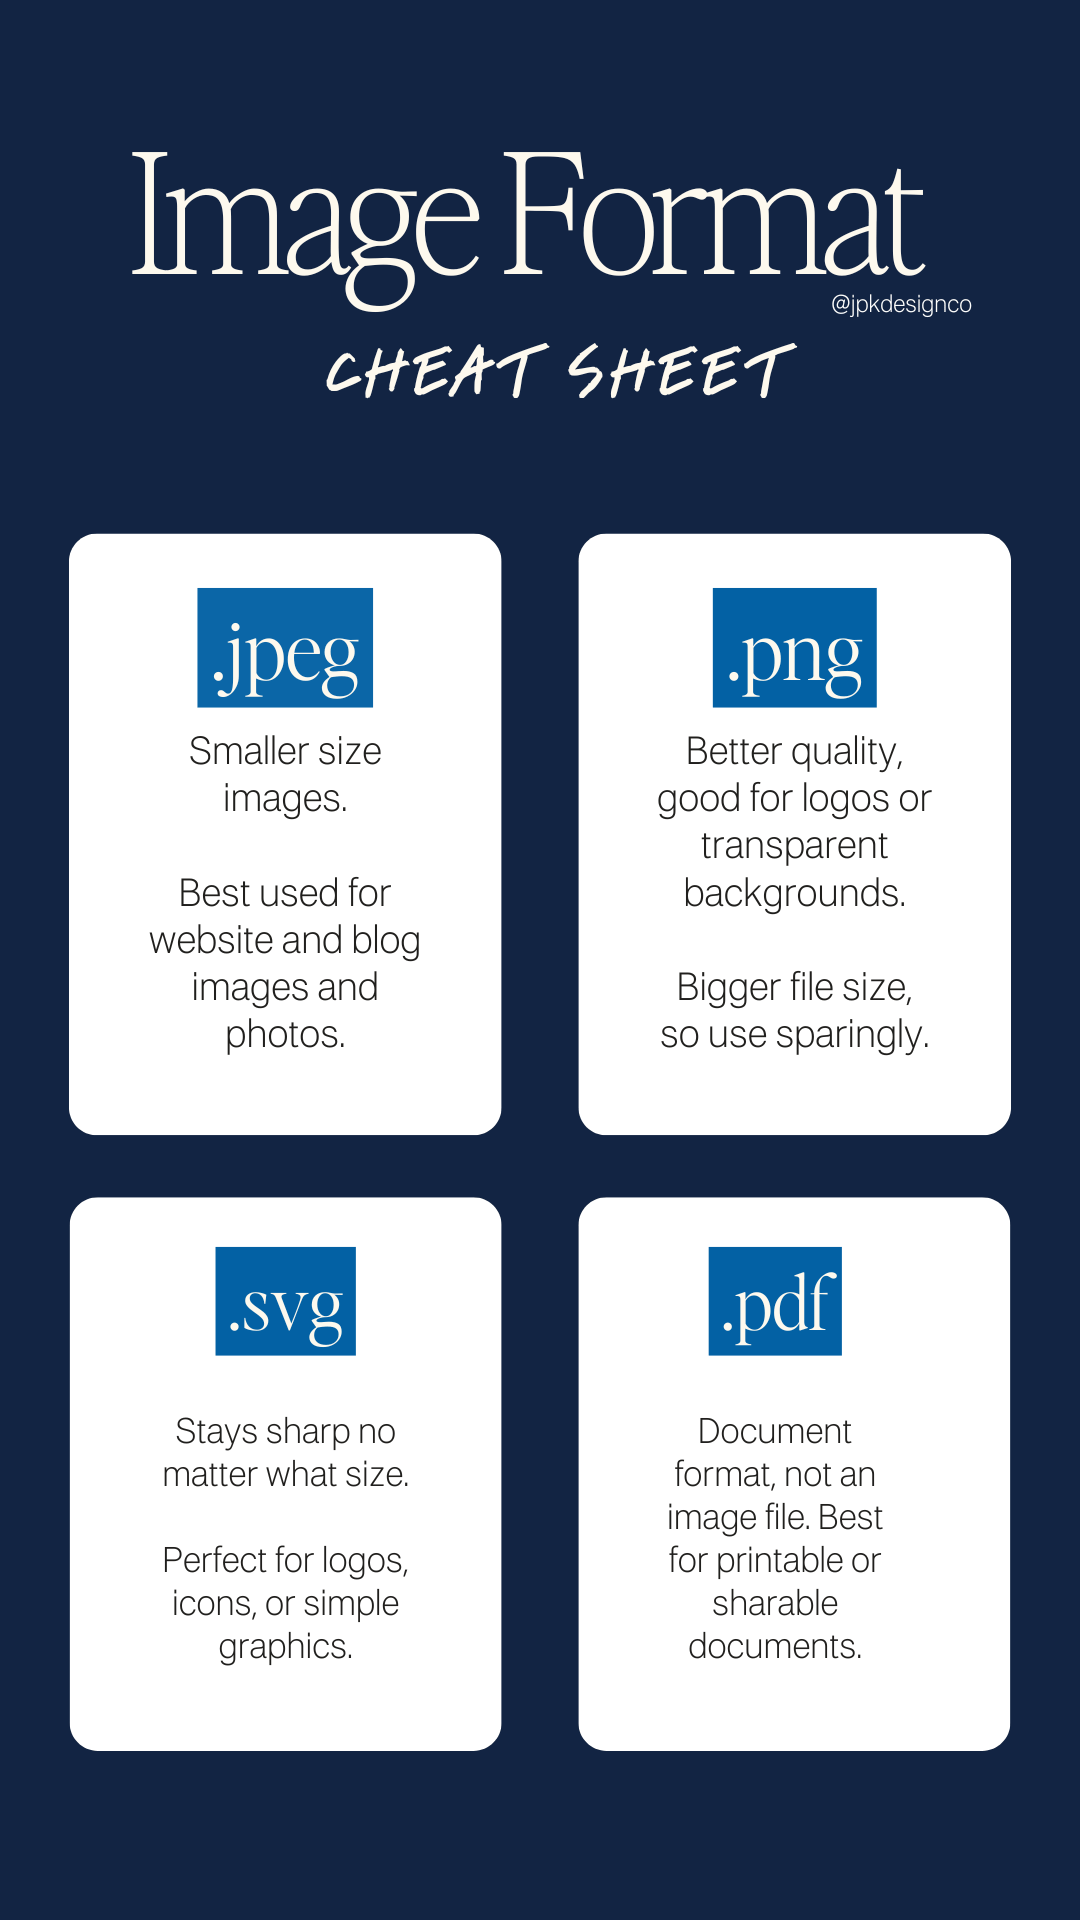
image format cheat sheet
Step 5: Choose Your File Format
If your image is currently a PNG: Change the "File type" dropdown to JPG. PNGs are typically much larger and JPG works great for photos.
If it's already a JPG: Leave it as JPG.
Step 6: Adjust Quality (Optional)
See that Quality slider? I typically leave it at the automatic 80% (High) setting or higher. Don't slide it below 80% unless you really need to shrink the file size more.

Step 7: Save Your Optimized Image
Click the "Save" button.
Windows will save the resized version and replace your original file. Here’s your option to rename the image file as well (you should.)
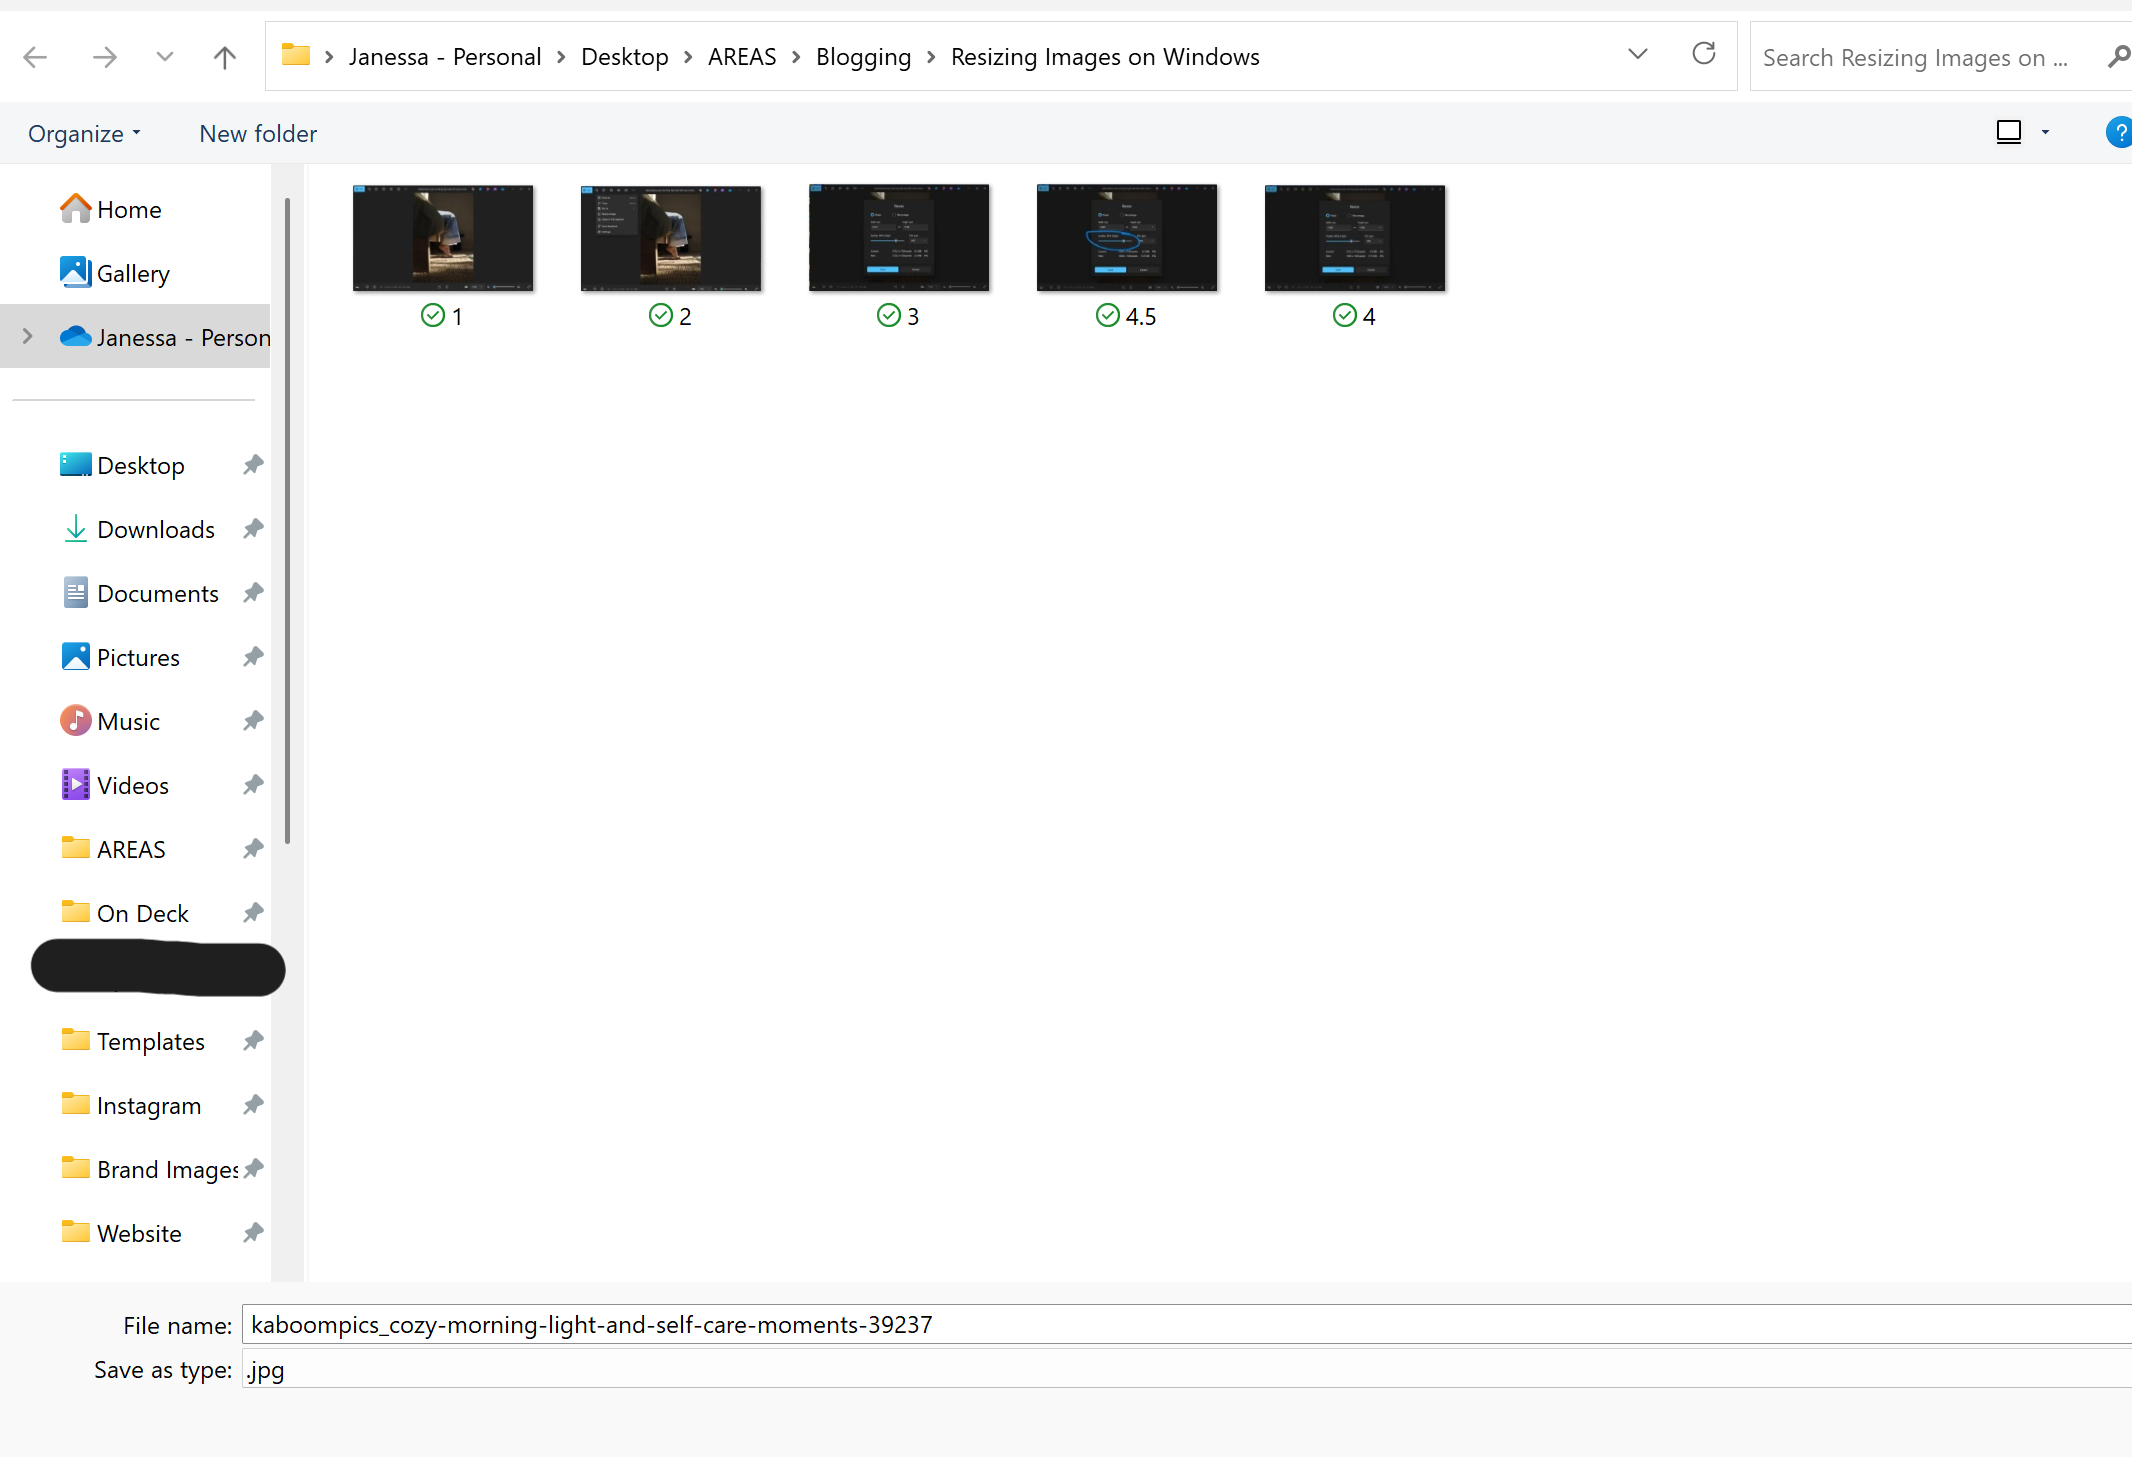
Screenshot: here’s where you can save the image on your desktop folder and rename it.
Before You Upload: Quick Check
Before uploading to your website, take a quick look at your newly optimized image:
✅ File size under 500KB? Perfect!
✅ Largest dimension 1500px or less? You're good to go.
✅ Still looks crisp and clear? Time to upload.
If the file size is still too large, try these adjustments:
Resize to a smaller dimension (like 1200px instead of 1500px)
Lower the quality slider slightly (but try not to go below 70%)
Pro Tips for Batch Processing
Working with multiple images? Here's how to speed up the process:
Create a "website-ready" folder for your optimized images
Copy your originals first so you always have backups (Windows SHOULD do this automatically, but if you want to be super sure, it’s always good to have a backup)
Work through them one by one using the same settings
Wait until the end to rename them with keywords. You can select all your newly resized images by hitting Control and A on your keyboard at the same time. Then choose the ‘Rename’ option (see the the arrow below).

When This Method Doesn't Work
The Windows Photos app is perfect for most image optimization needs, but if you need more control over compression or want to batch process dozens or hundreds of images at once, here are some other alternatives to consider:
Tools to Resize Your Images
🌐 Online Resources
Squoosh
Drag in your image, adjust the size and format, and download the optimized version. It’s simple and gives you a real-time preview so you can tweak without guessing.TinyPNG
Great for compressing PNG and JPG files. It keeps your images looking clean while dramatically reducing file size.Pixresize
Created by Rache at Squarestylist, Pixresize is built with website owners in mind. It runs entirely in your browser, so your images aren’t uploaded or stored anywhere. You can resize, convert, and prep your photos while keeping everything secure and private.JPEGMini
I just learned about this one. This one does have a one time fee, but I’ve heard it’s great. If you are just doing your own website photos once, it’s probably overkill, but if you have clients this could be a great option.
🧰 Other Tools
Adobe Photoshop
If you already use Adobe, you can resize and prep images for web inside Photoshop. Go to Image > Image Size, adjust your width and resolution (72 PPI is standard for web), and save as a JPG.Adobe Express Free Image Resizer
A good free option if you don’t use Photoshop. Upload your image, pick the size you want, and download it ready to use.
You're Ready to Upload Your Resized Images!
That's it! Your images are now optimized and ready for your Squarespace site. They'll load faster, look professional, and help your site perform better in search results.
Next steps:
Rename your files with descriptive and SEO-optimized keywords.
Add alt text after you upload them to Squarespace (Squarespace recently released a built-in new AI tool to handle ALL of your alt text for images in one easy spot. Head to Settings —> Marketing —> SEO Appearance. You’ll see Your SEO Completion Score, then “Improve with AI”.)
Check out my complete image optimization guide for the full process.